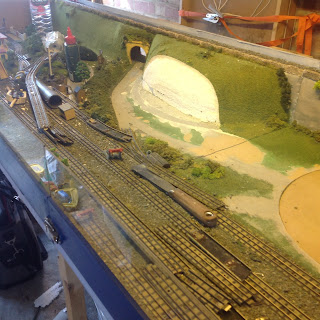
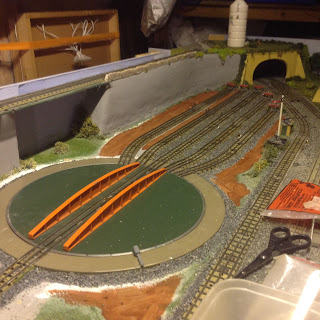
The last time I had a genuine Dublo turntable, it was on the old layout...
So with this one in need of replacement, and with the motorised HD version completed (as per the last post) it's time for this one to come out...
Should be a nice, simple task shouldn't it?
Nope.
To demonstrate the problem more clearly, here's the Märklin being installed in 2014. Note the track positions on both sides...
And compare that to how the genuine version looks (this is the same turntable being re-used!)
One of the many lessons learnt with the first layout was to keep all trackwork as straight as possible - lots of kinks and bends on the turntable siding created lots of issues. To do that here, we'll need to do some serious re-modelling.
So out with the old and onto the first problem...
A big hole! - The only way to overcome the difference in track height between the two systems.
Then all the sidings have to come up as these will no longer line up...
To get the straight track that we need, we needed to scale back the hillside in the centre board (known as Miller Mound!) so drastic measures required...
Not bad for shed insulation. We could have left it as a chalk face, but we prefer grass!
Still on deconstruction at this point...
The old turntable made a very good template to cut a new piece of board. The hole is required for the motor & gearbox...
And of course all the ballast has to come up...
Miller Mound being remodelled with leftover polystyrene...
Filling the gaps...
A better look at the mound, with its new, narrower profile...
Which then had modrock applied...
Then painted ready for new grass...
Then the grass is applied in layers. It's very hard to see the join!
With the board suitably prepared, time to fit the new (old) turntable and start laying the tracks...
The new trackwork to the turntable is now straight. There's another reason for making this straight (watch this space...) the signal box has had to be relocated from the end board to the centre and is placed in between the tracks...
Still more track to be laid..
Checking alignment, the turntable bridge isn't quite centred here so looks slightly out of line...
More grass applied, loading gauge put back...
More alignment checking as the rest of the siding tracks are put back. Much narrower than with the previous turntable...
Some paint and ballast starting to appear. The track along the back isn't fixed because I have another plan...
I reckon, with a bit of modification, we could sneak in a 6th road at the back...
Ballasting the tracks leading to the turntable...
The points had to be moved further back to accommodate the new alignment, so all the trackwork and ballast had to be dug out from the main lines to the tunnel...
A modified pair of points needed to create road six...
Some more greenery starting to appear...
Had to remove the LED strip from the outer board and rewire it into the centre board, so here it's being glued back into the signal box...
So we'll now have room to park two more locos and all six roads should be full usable, unlike with the old version!
We're happy!
But still loads to do...


No comments:
Post a Comment