Tuesday 17 January 2017

Extending...

It's been debated privately for some months, but now with the transportation arrangements sorted, and with sufficient trailer space remaining, it's possible to accommodate an additional 5ft extension to the layout.

The extension needs to be optional so that we can still be accommodated at smaller venues. When the turntable was replaced last year, we made sure that all the tracks between the two board sections were straightened, making the possibility of extending easier to achieve. 

The hope is to include two engine sheds within the new design, these may sit either side of the line running to the turntable. The extra siding space is much needed due to the growing number of locomotives. The left hand side of the extension will see the installation of a single road level crossing, hopefully with automated gates.


The initial SCARM drawing calls for thirty pieces of straight track in the lower section alone. That doesn't include the rear fiddle yard or the upper loop.

So far I've amassed sufficient straight track, dowel pins, electrical connectors, stone wall for the extended upper loop and there is still leftover polystyrene from the original build. Next job will be to acquire timber and then work can begin. We managed to build the layout in under five months, so two new boards will be dead simple, won't it..?

Sunday 15 January 2017

Bridport Model Railway Club - Beaminster Show

Our first outing of 2017 saw us back in Beaminster, which was one of our first exhibitions when we first built the layout.

The trailer made its debut as the new weapon of choice for transportation. After extensive work to install bespoke racking, every board now has its own dedicated shelf and thanks to the front and rear doors, it's now much easier and quicker to unload, setup and pack down. Pack down was achieved in about 30 minutes from the last train running to starting the car.


The new rear section of the upper loop also saw its first proper exhibition run. All four sidings working well. The straight section has had to be reinforced with angle-iron to prevent warpage. Now it's dead straight (and very heavy!)

The VEP has found a reliable new home on the upper loop


The turntable continues to work well, even after a winter rest. Here the locos are shuffled around in the sidings.


80104 & 80105 spent most of the day running to and from the sidings to the rear of the layout, while some of the recent repairs were put through their paces.


The Prototype Deltic now has two fully functional LEDs once again and plenty of pulling power.


The blue & grey EMU, complete with replacement gear worm, is also back to full, fast running.


A few electrical gremlins with the recently modified rear boards - one of the disadvantages of working on the boards individually and not being able to function test them as a set. The new patch leads worked well however, as did the isolators on the outer sidings, which now allows two trains to be parked on two of the sidings. A minor modification to the wiring is needed to ensure that the inner sidings function properly, along with the upper loop points at the far end, which also didn't quite work as planned.

Four potential booking enquiries received for this year, we won't be able to attend all of them but 2017 is shaping up to be the busiest year yet.

With thanks to the Bridport Model Railway Association for their hospitality.


Saturday 7 January 2017

Rewiring the rear boards

One week into 2017 and three of the tasks on the resolution list are close to being completed!

Work has begun to repair, rewire and modify the wiring on the rear three sections, starting with relocating the edge connectors so that patch leads can be used. Although these have worked really well, it's difficult to fault-find when the boards are clamped together, on some occasions the boards have had to be split just to disconnect them. This will make diagnosis much easier.


Next job was to sort out the points that had stopped working. I suspected that the problem was with the control boards that I built some time ago. Although they've worked pretty well, the PCB boards were too small when acquired, so the capacitors had to sit above the relays. In a loft scenario this wouldn't be a problem but mounted under the rear boards (which were then stacked upside down on the front boards) they were prone to being knocked and several of the solder joints have been damaged as a result. So time to replace these...


For something mass-produced, smaller and hopefully more reliable... 


I haven't been able to find double pole relay PCBs, so two relays will be needed for each pair of points - one relay to control the solenoid, the other for track isolation.


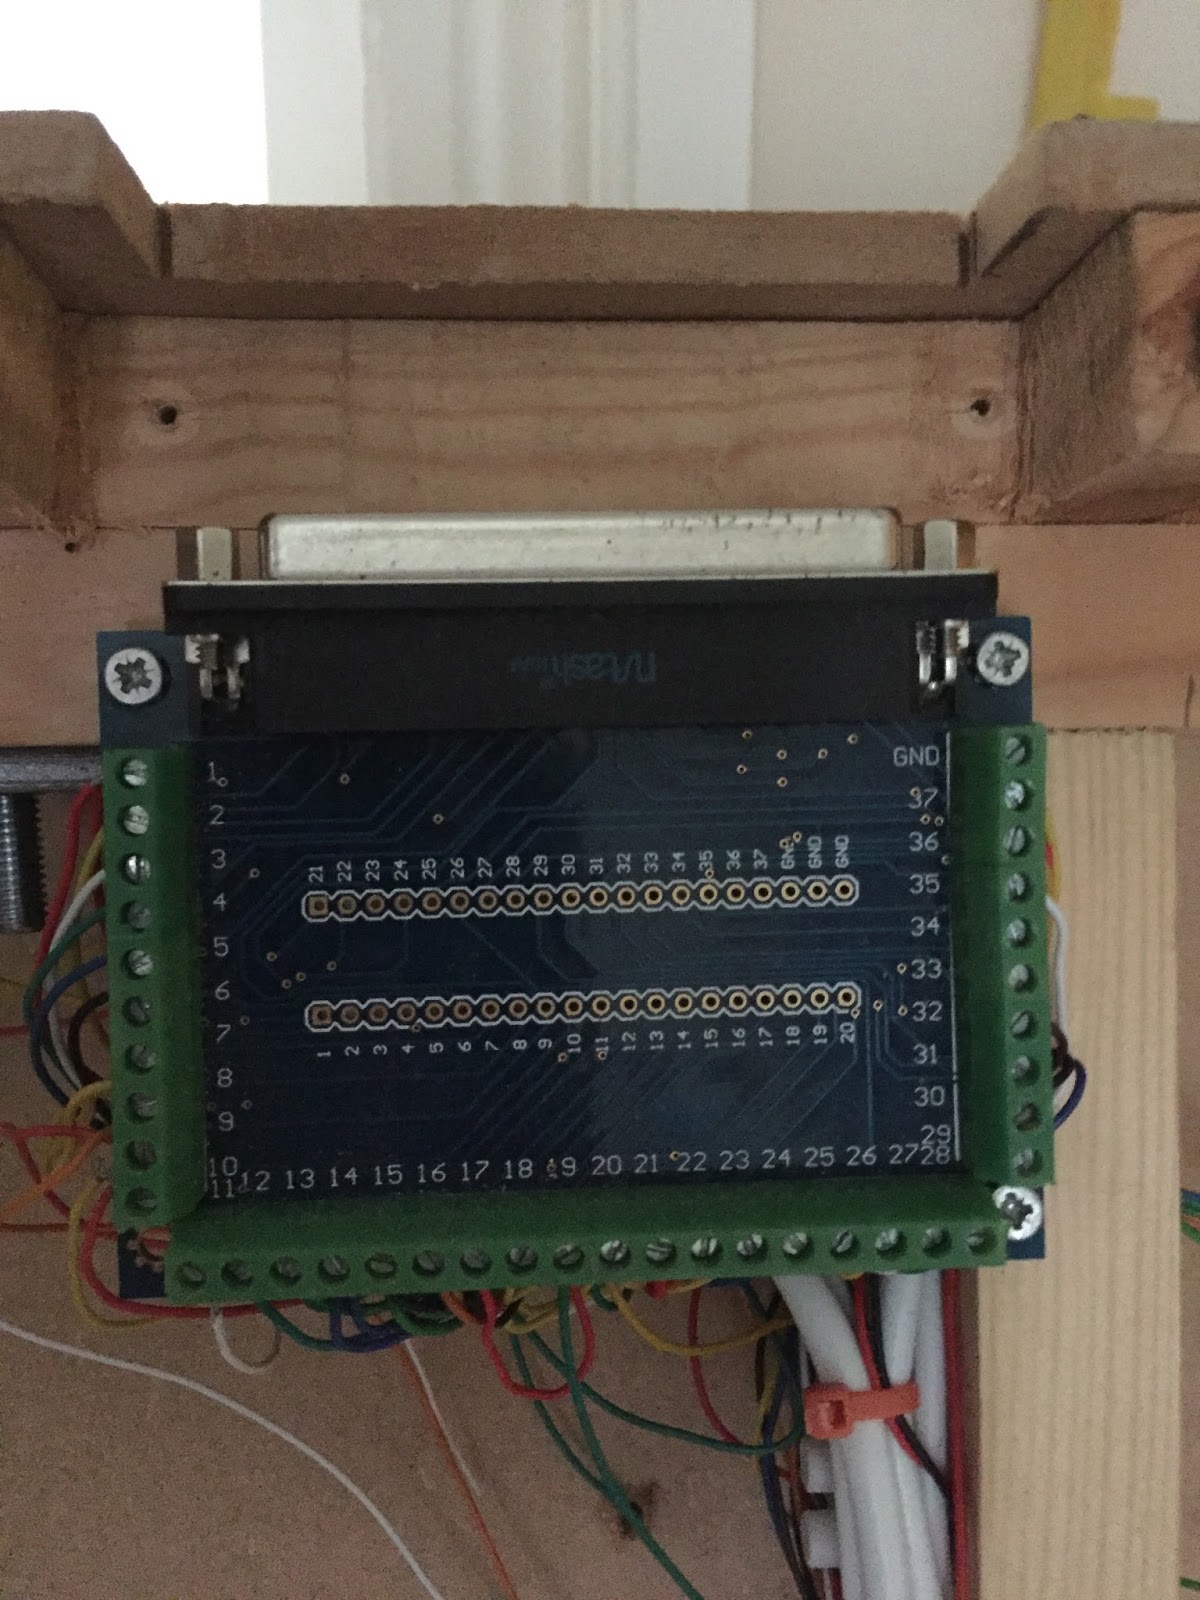
Each relay has its own trigger, we simply have to link the four inputs to the eight relays.


More capacitors required, 4700uf at 25 volts should do the trick...


 Here, the live feeds have been wired & linked (red) while the relays that need to be linked are starting to be wired...


1-5, 2-6, 3-7 & 4-8...


The capacitors are designed to be mounted on a PCB, so for this application I've used heat shrink to protect them...


Now the common return connection for the points solenoids is added...


The points solenoid control is now done...


Now the links are added for the four pairs of points in this section (one from the main loop which feeds three sidings) and then the job is finished, ready for installation (just a few more to make!) 


From top to bottom - The new control for the three upper loop points on the new rear upper section (not yet wired) below that is a further three points control module, a home-built one which is made to a much better standard using a larger PCB, this operates the three sidings that are accessed from the turntable sidings at the front. Below that there is a central wiring connector block where two of the new controllers have already been screwed into position, with one of the old controllers still wired in and slowly being removed...


The new controls are much shallower and with the new trailer racking they should never get knocked.


Testing with a transformer. The other main advantage of these PCBs is that they contain a power indicator LED and individual LEDs for each relay - no more scrabbling around with a multi meter & torch when a pair of points fails, now all I have to do is look to see if I have a green power light and two red relay lights for each pair of points. Simples!


The new, rear upper sections now contain three pairs of points at each end, so two more controllers were needed. Here the points are wired to a 9 pin RS232 connector.


And the other end of the connector is wired to the module. 


The same process now needs to be applied to the board at the other end. The centre board has already had its wiring modified for the additional upper loop points and the module for the other end has also been installed. Hopefully if I've wired them right this time, the siding isolated sections have also been re-instated.

Sadly I can't test this little lot without assembling all three boards, so it'll have to wait until the next exhibition.

The new relay boards may look over-engineered but in reality, for what these have cost me, I couldn't have built them myself for the price I paid for them!

Monday 2 January 2017

New Year's resolutions 2017

Happy New Year!

So here we go again then, another year of exhibitions looming and another list of things to do.

So having given this some thought over Christmas, the list this year is as follows, and in no particular order:

1. Finish wiring the top loop rear section (points at the far end need to be wired)

2. Repair & rewire the rear fiddle yard to include the isolated sections that never worked previously, the dead-short on one of the inner sidings and several pairs of non-operational points.

3. Relocate the board connectors and utilise the patch leads that I made last year. (leftover from last year's list)

4. Install the Arduino signal aspect controller.

5. Replace & repaint the back scene.

6. Expand the layout by adding an optional 5ft extension.

7. Automate the gates of a single road level crossing using servos and Arduino.

8. Reorganise and correctly label the stock boxes.

9. Clear the desk of restoration projects intended for sale, and then sell them.

10. Ensure that everything is ready for Warley in November.


All of the above need to be completed before number 10!