I realised that in less than five days time I'll be exhibiting my layout again. Also realised that I haven't ordered the transfers for Duchess of Atholl so I'll omit that one from this weekend's run. Also realised that I haven't done anything regarding restoring the St Paddy that I recently won.
I'm still baffled as to why anyone would do this to such a desirable model...
Thankfully, someone else's loss is my gain and I was confident that I had enough spare parts to bring this back to life without costing a penny!
My initial thought was to do a temporary body swap with one of the other Deltics but in the end I decided that I had to make this one work and stripping the others wasn't an option.
First of all I attended to what was left of the original St Paddy. The surviving bogie's coupling was broken and this was changed easily (these are only held in place with one screw)
I also noticed that most of the tyres were either perished or missing. After a quick scrape with a screwdriver, this was pretty much all that remained!
After cleaning the wheels first, I fitted new tyres. At this point I also checked for magnetic strength. Nothing too scientific here but the screwdriver test showed a pretty strong magnetic pull and my other test, which involves applying finger pressure to the wheels, indicated that this one has a fair amount of pull. With a weak magnet, doing the finger test will slow the motor to a stall.
Normally I would fit a neo magnet, however whilst I have them in most of my locos, I find them to be too strong for the Deltics. One of the reasons for securing all the signals on the new layout was because we found that on the old layout, the Deltics could pull the signals over and the sidings were so close together that two Deltics couldn't be parked side-by-side, otherwise the two would stick together!
Now for the missing bogie...
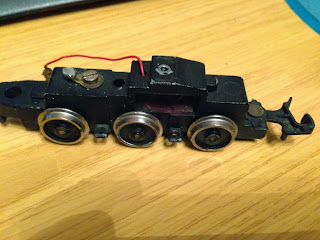
After much searching, I found a bogie, sadly with no wheels or pick-ups! After more searching I found enough wheels to build up a bogie...
After yet more searching, I found two pick-up assemblies...
After bolting the pick-ups into position and a couple of insulation resistance tests, I soldered the existing wires to the replacement bogie...
And finally found two side frames in the biscuit tin of spares.
All done...


No comments:
Post a Comment