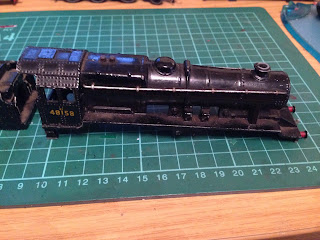
At some point in its life it's had a makeover with brush paint,leaving an uneven finish...
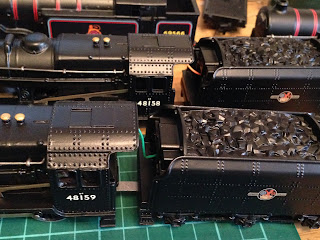
...and tender decals that are very faded:
After dismantling and stripping for paint, I also checked the motor. It's been running fine but has spent many hours trundling along the upper loop with the other 8F. The brushes were worn almost to the metal, so these were also replaced.
This was a real no-hoper. Rusty, seized and looking really sorry for itself. Most people would probably break this for spares.
Not me though.
The wheels were locked solid...
And the body was pretty poor:
Rusty valve gear and amotor that just hummed when powered up...
So the chassis was stripped and wire brushed to clean up the wheels, which were eventually freed-up...
Still not looking great...
...so further stripping needed...
...and a little chemical assistance to strip the remains of the paint from the chassis:
After priming, satin black paint was applied...
For the tender, it was possible to wire brush and repaint, leaving the wheels and pickup in-situ. It would have created more problems than it solved to strip this.
Much better!
The body was chemically stripped and then wire brushed...
...then primed and painted satin black...
Two coats later...
And while the body dried, time to reassemble the chassis.
I've never had great success with refitting valve gear and quartering the wheels properly. Usually the wheels end up wobbly so this time I used my pillar drill as a press. These all went together perfectly, and first time!
The underside now looks much more presentable:
Now for the motor. Stripped, greased and armature cleaned using a fibreglass pen and drill:
Then the motor was remagnetised...
The chassis was then fully assembled...
...and powered...
Quick test fit...
New, waterslide transfers for the tender...
...and then time to prepare the cab sides...
The transfers are soaked...
...carefully placed into position...
the backing then slides away and the transfers slide all over the place!
The first three digits were supplied as a set...
...then the final two digits are added using the same process...
And the 8F graphic is applied above the cab numbers...
Matching pair...
Much better looking underside...
The original plan had been to restore this to 48158 and sell it on. However, given the amount of time and effort that went into restoring it, I decided before I put the transfers on to keep it, numbered it accordingly and these two will now run double-headed on the upper loop.
A Duchess of Montrose and 0-6-2 tank were also acquired at the same time and in similar condition but these will probably be restored and sold to cover the cost of the investment. At least I still get a perfectly usable 8F for the price of three scrap locos!


No comments:
Post a Comment