Saturday, 15 November 2014

Tuesday, 11 November 2014

Revamp (maybe)


After a lot of discussion about what went well during the exhibition, what wasn't really needed and what didn't really work, we ended up with two problem areas.

First was the set of double points from the outer loop to the shuttle, which we've already decided to remove and will streamline the front of the layout, reducing derailments etc.

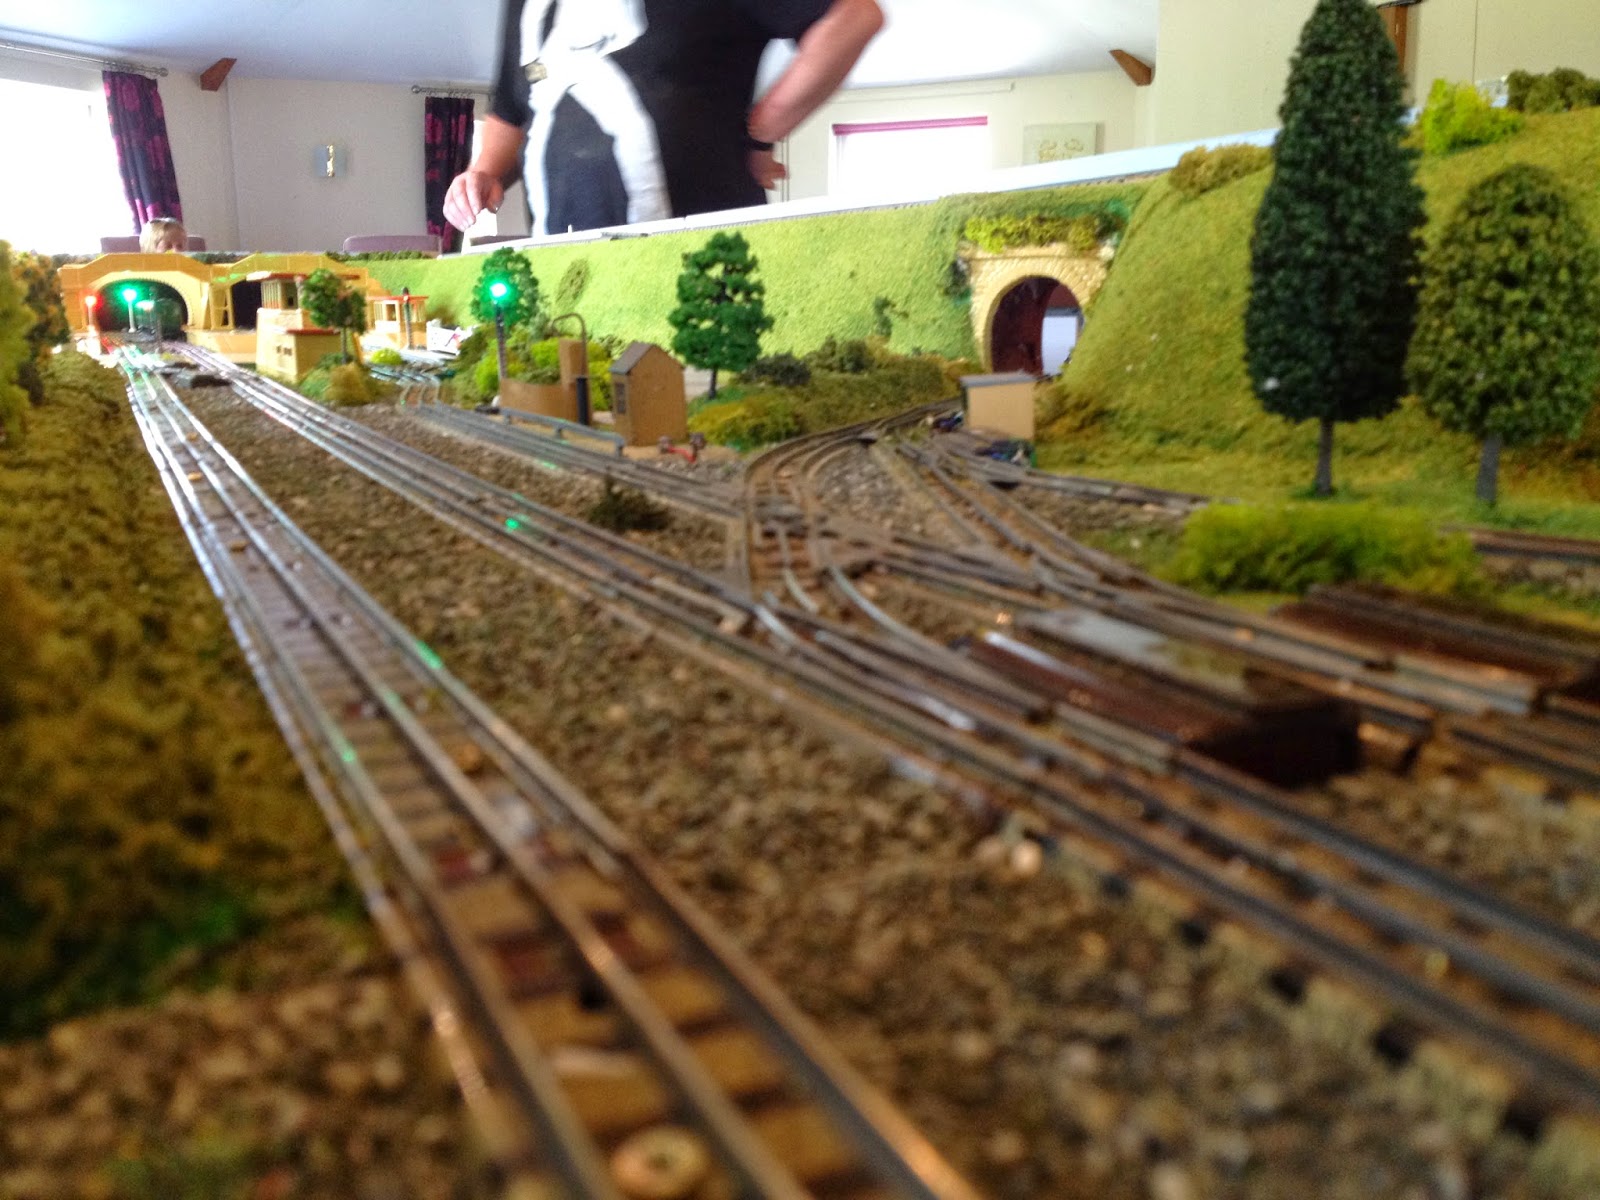
The fiddle yard has also come under scrutiny, while it is very large there are a number of reverse curves and this made moving trains difficult, also crossing to the outer loop via either of the two diamond crossovers proved difficult and required stopping whichever train was running on the inside. Then there's Canadian Pacific - on the inside loop it hit the points levers of the fiddle yard due to the overhang on the bends, on the outside loop it hit the edge of the boards!

I didn't want to lose the run round ability but also want to be able to park long, complete trains - especially on the outer loop. So I've revisited my Scarm design, firstly to remove the points from the front and then to design a more train-friendly fiddle yard.

This is the design I have in mind...


It will require some major work to achieve this look. Mainly because of the design of HD points with their operating lever (manual) or large solenoid (electric) which gets in the way of joining two points immediately together, you have to use quarter rails normally, which then reduces the number of sidings you can have due to the extra space this eats up.

I tried, and failed to find a way to modify manual points, however the electric ones seem somewhat easier, so after about 30 minutes I'd stripped two pairs of electric points and used the solenoid from a left-handed pair and grafted them onto a right-hand pair, placing the solenoid on the opposite side to where it would normally be...


I'll need to modify eleven more sets of points to make this work. These seem to operate fine in their new state but of course there's the small issue of building more electronics to operate them, and then there's the control panel - currently there's little room left for more switches unless I either redesign it, or build a second panel purely for the fiddle yard.

And if I electrify these, what about all the others? - Then what about electrifying the upper loop points so there's no more running around the back to change the points over.

I swear this thing will never be finished...

Saturday, 8 November 2014

Train Cam

I bought a cheap keychain camera in the hope of bolting it to a scrap wagon and film the new layout from a unique perspective.

Sadly it didn't work out too well and after managing to just about capture the shuttle, it gave up (and got launched in a fit of rage)

The efforts were uploaded to YouTube and can be found via the YouTube tab that's been added to my blog.

Not to be beaten, I tried another, more expensive version and before the show opened for day two I had a quick trip around most of the layout. Only once I got home did I remember that I hadn't filmed the upper loop or the turntable & sidings.

Next time I set up the layout I'll film them too.

Anyway, for now here's the layout viewed from a spare 0-6-2 chassis, courtesy of some velcro and blu tac!

https://www.youtube.com/watch?v=ARzpSBDXc-c

Exhibition's over!

Quick as a flash - the two day exhibition was over!


We were very well received, lots of nice comments and about five offers to show at other exhibitions next year, which I'll consider.

As for casualties, after two weekends of solid running back-to-back I expected some failures - Dorchester needed some lubrication after one of the axles seized up. My original 8F 48158 refused to double-head with the other 8F, despite working perfectly the previous weekend, this was found to be caused by a dry motor bearing. Again a quick lube and off they went together again.

Duchess of Sutherland made only a few laps of the layout before expiring having shed its connecting rod on one side. Worryingly the rod pins are still attached to the wheels and refuse to budge, this is the only non-runner of the weekend, however there was plenty of stock to run.

We'd already worked out from the previous weekend which rolling stock suited which tracks and kept all four tracks running for most of the time all weekend - not a bad achievement considering the age of the rolling stock and the track.

The shuttle loop, manned by 0-6-2 and 2-6-4 tank engines with a single coach each, ran faultlessly, if a little too fast, all weekend. This hopefully will be resolved by upgrading the old H&M Duette controllers. More to follow on that little project.

As for the layout itself, well it performed really well - no major work required but some simplifying will be done by removing a set of double points between the main loop and shuttle. When I originally designed the layout, the shuttle was a bit of an afterthought and having now spent so much time and effort getting it to work, the platform dedicated to the shuttle in the main station will never see use like it did on the previous layout, it'll be the permanent stop for the shuttle trains so there will be no need to send trains from the main lines into the shuttle. The points at the end, hidden in the tunnel will remain so that trains can still travel to and from the shuttle, they will just have to reverse instead! However after completing four days of running, this option was never explored and the shuttle was left alone.

More pictures...


The fiddle yard, with most of the sidings in use, while Cardiff Castle and the working 8F haul the brick wagons.

Viewed from the village terminus of "Brough" the 0-6-2 and single coach have departed to the main station, Brighton Belle is in the distance.

Brighton Belle trundles along the outer loop while the red LMS (Wrenn body) 2-6-4 waits in the main station.

Another 0-6-2, Green LNER tank hauls a rake of Southern coaches.
(Purists and rivet counters look away please!)

The main station, with buildings illuminated.

Better view of the front with a triple-head of Deltics hauling the goods train.


Video of the weekend is here, at 18 minutes it's a bit long and possibly boring for some but there's plenty of variety, sadly the video quality isn't that good due to the .mod files not being Windows 8 compatible, my iphone was jammed full of photos and I had to convert the files to make them work.


Enjoy!


Tuesday, 28 October 2014

Shakedown

Final chance to prepare for the exhibition weekend, so the layout was fully assembled with all the stock for final testing...


A few little tweaks to iron out but nothing too major. A good opportunity to work out which locos suit which trains and tracks. A few more photos below...


Every spare piece of siding space will be in use and still some stock will have to be left in the boxes (but nowhere near as much as with the previous layout!)

We've got the layout running really well and there were no casualties or unexpected problems.

Hopefully it'll be an enjoyable weekend.


Sunday, 12 October 2014

Build costs

I never kept a running tally of the cost of building the new layout - probably just as well but having discovered that Ebay keeps a purchase history I started totting up the expenditure.

In Ebay purchases alone, that's mainly the electronic gubbins, board dowels, feet, latches and scenery like the extra platforms, tunnel mouths and modrock,  the total comes to £504.10.

That figure doesn't include the cost of all the timber, the four litres of PVA glue, ballast, grass or sahara beige paint. Thankfully the track was recycled from the old layout, with any extras being liberated from the loft layout, which is now reduced to a single, small running loop of 12ft x 4ft!

Then there's the cost of having to buy new racking as the old arrangement failed, causing the new layout to crash onto the car, then there's the cost of the damage to the car...


Thankfully everything is now repaired but this is a day I wont forget in a hurry. Thankfully the layout escaped pretty much intact apart from a few crushed pieces of track, a bent signal and losing one of the suitcases from one of the platforms (the four litres of PVA glue probably helped)

In the interests of fairness I wont factor in the cost of the car or the new racking, even so I anticipate a final build cost of nearly £1000!

I wont be scrapping this one in a hurry..

Monday, 22 September 2014

Bubble car & (finally) restored the VEP


On the right - my latest acquisition for the new layout, this will run on the shuttle loop in the smaller platform. Sadly HD never made any single car units but this Hornby version will be used as a demonstration that modern stock can be made to work. Current pickup is via a Marklin skate that just about fits underneath and current return is via all eight wheels.

And on the left - After almost two years, the VEP is repaired!

My previous attempts to repair ended up causing more problems than were resolved. In the end I snapped off the top of the motor housing and lost both power pickups from the motor bogie. Spares for these appear to be hard to source at the moment so when a scrap motor chassis appeared on the internet, I snapped it up. Thankfully the parts remaining on the scrap chassis were all the bits I needed to finally resurrect this thing!

Current draw initially was just under half an amp, quite high for modern stock. This settled down to about 0.3amps but still doesn't run anywhere near as nicely as the Bachmann multiple units. Quite a bit of rolling resistance is notable on the unpowered carriages and the rubber tyres make the motor bogie rise up when starting from standstill. I also had to remove the front and rear couplings to stop it from derailing on corners, I gather from some internet research that this has been a problem for other users. I'd love to run this in multiple with the CEP but I'll need a way to couple it and then I'll need to find a way to slow down the CEP to avoid wheel slippage.

Nice to finally see it in action, just needs a good clean up, it's covered in dust!


Wednesday, 10 September 2014

New layout: Revisiting the checklist

In one of my first posts regarding the new layout I wrote a checklist of things I wanted, stating that I'd be happy if I achieved everything on the list.

So...

Faster setup with more fixed track - DONE (set up in under 40 minutes, pack down 30)
Platforms can be fixed into position - DONE (only 2 ramps loose-fitted)
Platforms and buildings can be illuminated - DONE (all buildings illuminated)
Signals fixed in position and permanently wired - DONE (and converted to LED)
TPO fixed into position and permanently wired - DONE
Raised track, independent of the two loops - DONE
End-to-end terminus running - DONE (automated shuttle and points control)
Ability to run four trains plus shunting duties - DONE
Use of tunnels, bridges and scenery - DONE
Reinforced boards that won't warp in storage - DONE
Increased siding space at rear of layout - DONE
One person operation more practical (standing behind layout, not inside it) - DONE
Self-supporting legs, not running on tables - DONE (layout now 1 metre high)
Able to use the Märklin turntable - DONE

Impressive!

One issue that has come to light is that the 9 pin breakout PCBs we used to join the front and rear sections together are significantly weaker than the 37 pin versions used on the rest of the boards, they struggle to line up, wont stay in position as they're only held in by two screws and because the front and rear sections tend to be connected at an angle, I struggle to connect them. I've ordered two short extension cables and will relocate the breakout PCBs away from the board joins and use the cables to connect. This will take about 5-10 minutes off the setup time (hopefully).

Monday, 8 September 2014

New Layout: Final testing

After spending more than a few hours tweaking tracks, sorting dead spots and track shorts, and trying to level the tracks to avoid the annoying uncouplings, we finally set up the layout for an evening purely to run it for ourselves.

However we discovered that the floor of the hall we were using wasn't particularly level, which resulted in a couple of high spots. I'll resolve this by purchasing some adjustable feet to fix to the bottom of the legs.

It became clear that the speed of the locos on the shuttle is a problem, ie if we use two trains on the auto changeover, they will need to operate at a similar speed to avoid either crashing into the buffers or stalling mid-journey. A few combinations were tried, even the two Bachmann EPBs have massive variances in performance and wouldn't run together that well.

The CEP finally got an outing, normally this one gets left in the roof due to the amount of space it takes up but it seemed really at home on the upper loop so we'll definitely be using this for the exhibition.

Brighton Belle caused us no end of problems during the last testing session, having been gifted some Wrenn pullman coaches I've replaced the couplings on the two end cars, these stayed coupled and ran faultlessly all evening.

I think the layout is now about as perfect as it's going to get, there will always be gremlins - after all this stuff is over fifty years old now and never designed to be incorporated into a scenic layout like this. The control panel with its shiny new ammeters also performed really well and I'm pleased that I spent the time changing to analogue dials.

And that's pretty much it for now. Next and first proper outing for the layout is at the end of October, one week prior to the exhibition. We decided that no further work is required and the small things like fitting buffer stops, adjustable legs and half fish plates can all wait until then.

We achieved what we set out to do - build a layout in time for the exhibition in November, and we've done it!

Now we can relax for a while.


Sunday, 7 September 2014

New layout: Fame at last!

The whole purpose behind building the new layout was for an exhibition that we'd been asked to do in November 2014 (and already we've had two requests to exhibit elsewhere in 2015!)

Since joining the model railway club and taking the layout to some of the sessions to work on it, we've attracted a fair amount of attention (all good) and we're now featured on the Weymouth Model Railway Club website, a write-up has also been submitted to Railway Modeller, who have also apparently expressed an interest in what we've been doing.

A very nice little write up including some stunning pictures taken by one of the club members can be found here:

http://www.weymouthmra.org.uk/layouts/members/i-ad-that-andy-and-steve-miller/

New Layout: Ammeters

I decided to revisit the control panel as one of the ammeters kept showing a current draw of over 7 amps.


This caused some major concern when it first appeared on the display. For starters it shouldn't be possible for a Duette transformer to tolerate that kind of current draw for more than a few seconds - this went on for considerably longer. Thankfully I soon realised that both tracks were actually running perfectly and quickly deduced that the problem was with the gauge itself.

When I designed the panel I already had the two ammeters that I'd intended to use in the loft and as there was only two, there was no provision made for more, even though there are four controllers. A few issues with the upper loop, combined with the realisation that we could actually use the top loop for much longer, double-headed trains made me realise that we should consider installing ammeters for every controller.

The digital ammeters also don't really suit the vintage 1950s look, plus they have to be wired between the output and the track, wiring between rectifier and controller is preferred as this would measure current irrespective of the direction of the train but these digital meters just wouldn't work in that formation and they can't measure negative current.

I needed a better solution so I went back to basics, analogue meters - nothing wrong with a big needle swinging across a dial face!

After hours of searching I couldn't find a design I liked, the ones I did like didn't have the range I was looking for, I know it's possible to adjust this but this would be more time-consuming. In the end I bought a set of cheap gauges and decided to have a bash at creating a bespoke dial face.


Very cheap looking, and that's because they are cheap! Also they look relatively easy to dismantle.


...And they were! Here the faces have been removed and turned around so that I have a blank face ready for my bespoke design.


A quick scan of the original dial face gave me a design template to work with, after some colour and bespoke graphics, including adding the name of each track circuit via the totems, I had the design printed, again onto self-adhesive vinyl.


Same problems with inkjet printing on vinyl, very hard to smooth out the bubbles. After this picture was taken I stripped the dial again and smoothed it some more before final drilling into the control panel.


Thankfully I kept copies of all the files when I made the original graphics, I had to reprint the section behind the dials as most of it was destroyed during the drilling process.

These dials, to fit them snugly, require some pretty large round holes, I used a wooden hole saw to do this, it took ages and it's fair to say the hole saw wont be making many more holes now (but it did the job!) after drilling more holes to secure the gauges, I bolted them into position and then made a wiring loom section using more pluggable connectors so that the panel is still completely removable for onward maintenance.

The whole thing was then taken over to the layout for final testing - thankfully everything works and I now have ammeters that read in both directions, they also seem more accurate and react quicker to potential issues, vitally important stuff.

Wednesday, 3 September 2014

Tuesday, 26 August 2014

New layout - FINISHED!!!

Well...

We did it!

We finally have a working layout.

Another lengthy all-day session got us to completion within five months.

The cost, I haven't dared calculate, the man hours, obscene!

Our 16ft x 5ft show layout has three running loops including the upper loop and an electronically controlled shuttle, which now also throws the points at the terminus station, which alternates the locos along the branch. I figured that if I added a pulse operated relay (one pulse on, one pulse off) that this would work the points motor, getting the signal from the shuttle module proved more difficult however as the only outputs are via the power feeds for the LED signals. I did however work out that if I wired a transistor to the green signal connection, this would then operate a relay, which in turn would generate the signal to operate the points. A bit over-engineered but it does the job!

This is the first picture of the layout after we finally agreed that we could call it finished...


Buildings illuminated, model cars in place...


Just a couple of minor niggles with the track dipping in places but the layout still ran.


Brighton Belle found all the imperfections, the track and the Brighton Belle have since been modified...


It is sad the the old layout had to be broken up in order to produce this one but there was clearly no way that I could safely store both layouts and there was no way that it would ever have been used once this one was completed. Plus the boards were degrading badly and setup could take upwards of three hours - this one is running within 30 minutes (we timed it!)

I've ticked all the boxes from the initial design brief and attracted a fair amount of attention along the way.

This has been a very tiresome five months. I don't know if I'd do this again. We wanted to do something extraordinary with the old table top railway design while remaining as faithful as possible to the original Dublo designs and I think we've done that and more besides. I hope the efforts that have gone into making this layout by my brother and I really show come our first exhibition. I can't wait to get all the stock set up and run it properly!!!

Time to relax...