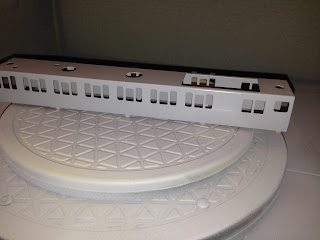
One of the most ambitious projects I've ever taken on. Firstly due to the design of the graphics - the extra grey & white portions of the BR livery will look pretty bad if they're not perfectly lined-up. The second issue is the state these bodies are in.
I touched on this briefly during the final Blue EMU update. Here's the first coach to receive attention, along with two knackered cab front ends:
The pictures don't really do justice to the state of the bodies, they're by far the most rusty bodies I've ever seen!
First job was to remove the loose rust and rub down:
Then the whole body had to be primed:
As mentioned before, the basis of the BR blue/grey livery is made using two rounded rectangles in MS Publisher, adjusted to the right size, with the coach graphics layered over the top:
After printing, the vinyl is cut to size, carefully lowered onto the body, checked for alignment and then the windows are cut:
The gloss vinyl (as expected) is way more delicate than the matt version. The ink doesn't tend to fully dry so the vinyl has to be carefully handled. Also it seems much harder to cut, the scalpel blade went blunt after barely finishing the first side.
A long and tedious process, after cutting in all the windows on the first side of coach number one, I fitted the cab front into position to see what it would look like:
A long, long way to go yet, and then I realised that the graphic was skew, so the whole thing was ripped off and new vinyls printed. While I waited for these to dry, I noticed the state of the coach windows:
A quick scrub with bathroom cleaner and it looks a little more presentable:
Time to concentrate on body number two:
This one was even worse and ended up stripped to bare metal!
The coach glass is also far worse:
So after cleaning up the windows and while I was waiting for the primer to dry on the body, I started looking at the one cab front end that I think I can fix:
I've repaired a chip before, but this is quite a large chunk of missing plastic. I've used epoxy putty to fill the gap, applying some to the damaged roof also:
Not exactly pretty but this stuff can be rubbed down once it's hardened:
Barely a few hours after filling, I was able to sand ready for primer:
Set aside to dry after priming, the damage is barely visible now!
The damaged roof and cab front, with the second body - looks a bit different now!
Nose-to-nose - Body one, now with its perfectly aligned graphics now needs its lacquer coat, while body two needs its graphics applied:
This is proving to be quite difficult. I still need to source another cab front end and a centre coach as the three bodies are all outer driving coaches. Hopefully I can get the first coach finished by the end of the week, the rest will probably have to wait until I can find the parts, and at a reasonable cost. Eventually the third body will also hopefully be restored, in the hope that I can create two, three car class 501s in BR blue/grey. This will involve acquiring even more coaches, so for now the aim is to get the first three car set finished.
More to follow...


No comments:
Post a Comment